/BERGASMS/GBA/04
04/08/22
Current Goal: I will get my red pixel rom working on a physical Gameboy Advance
Todays goal is to get my rom running on real GBA hardware. I am hopeful that this is as simple as sticking the rom onto my flash cart and being done with it but who knows. We may run into problems. The first order of business is to talk about the flash cart I got. I purchased an
Ez Flash Omega Definitive Edition Game Boy Advance Flash Cart. This isn't a paid endorsement or anything but props to retrogamingparts because I got the cart in like, 4 days, so they must have shipped it basically instantly because it got from Perth to Adelaide in a flash. So well done to them. I picked up a 64GB micro sd card to go with it so that is the cartridge sorted.
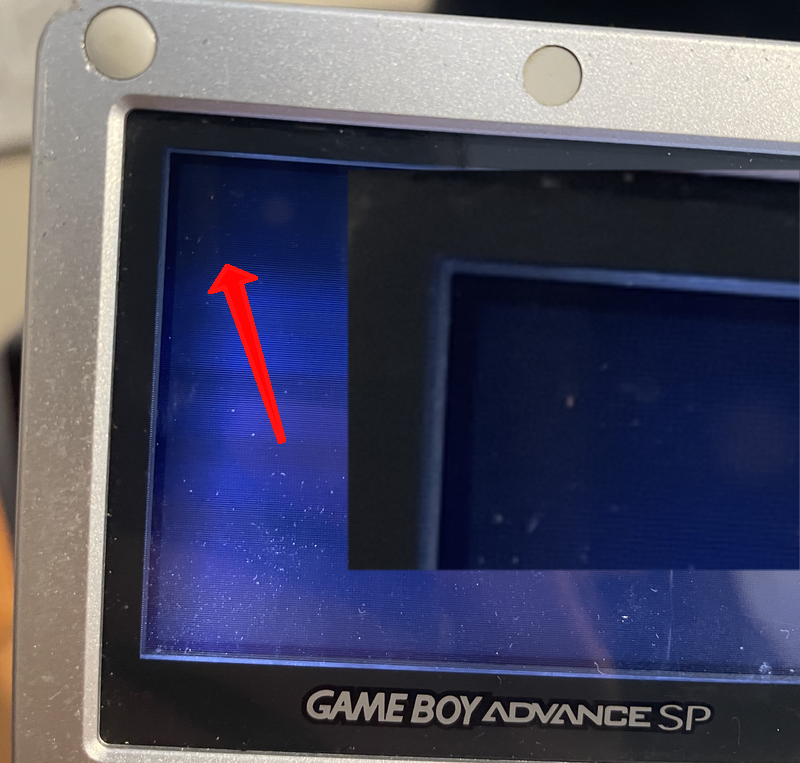
The next problem was finding my GBA. Well that's a lie, i found the GBA, it was the charger that I had trouble finding. After turning the shed upside down and a bunch of other places I finally found it tucked away in a box. I doubt the GBA battery is still working but I guess I don't really need it for this exercise. So, moment of truth, I copied the rom to the SD card, stuck that into the cartridge, put the cartridge into the GBA, powered it on (It still lives, yay) and selected the rom from the menu, aaaaaannnnndddd
SUCCESS
It just worked, which i guess more than anything is a testament to the quality of the mGBA emulator. There is a red pixel there, (source, trust me bro).
So this was almost anticlimactic. Todays goal was mostly solved by rummaging through boxes of cables and chargers. To flesh it out, i'm gonna instead write HI in pixel art a bit bigger so we can actually see it in the photo (And then i will clean the GBA screen).
I'm not going to mess with any fancy writing line drawing utilities or anything, just straight up while loops to write into the VRAM will do. But, it does let me talk about some nice Zig features. I modified the drawing code to the following (we don't need to keep modifying the VRAM in the loop BTW).
    var red: u16 = 0x001F;

    var y: u8 = 10;
    while (y < 60) : (y += 1) {
        VRAM[y * 240 + 30] = red;
        VRAM[y * 240 + 31] = red;
        VRAM[y * 240 + 32] = red;

        VRAM[y * 240 + 50] = red;
        VRAM[y * 240 + 51] = red;
        VRAM[y * 240 + 52] = red;

        VRAM[y * 240 + 80] = red;
        VRAM[y * 240 + 81] = red;
        VRAM[y * 240 + 82] = red;
    }

    var x: u16 = 0;
    while (x < 20) : (x += 1) {
        VRAM[30 * 240 + 30 + x] = red;
        VRAM[31 * 240 + 30 + x] = red;
        VRAM[32 * 240 + 30 + x] = red;

        VRAM[10 * 240 + 70 + x] = red;
        VRAM[11 * 240 + 70 + x] = red;
        VRAM[12 * 240 + 70 + x] = red;

        VRAM[58 * 240 + 70 + x] = red;
        VRAM[59 * 240 + 70 + x] = red;
        VRAM[60 * 240 + 70 + x] = red;
    }

    while (true) {
        naiveVSync();
    }
A really nice feature of Zig is how we can define the code that updates the loop conditional variable up the top with the while statement. For simple loops like this it is super clean and obvious what is going on. I like this.
    var y: u8 = 10;
    while (y < 60) : (y += 1) {
The first block just draws the 3 vertical lines into VRAM. The second block draws the horizontal lines. The only different you will notice is we have defined the x variable as a u16, and not as a u8. This is because if we try to make it a u8 it won't compile.
$ zig build
./src/main.zig:124:23: error: integer value 2420 cannot be coerced to type 'u8'
        VRAM[10 * 240 + 20 + x] = red;
                      ^
Zig checks for us that the values our expressions produce fit into the types we are using. By making it a u16 we have more than enough room for the expression. Anyway, the end result is as follows.
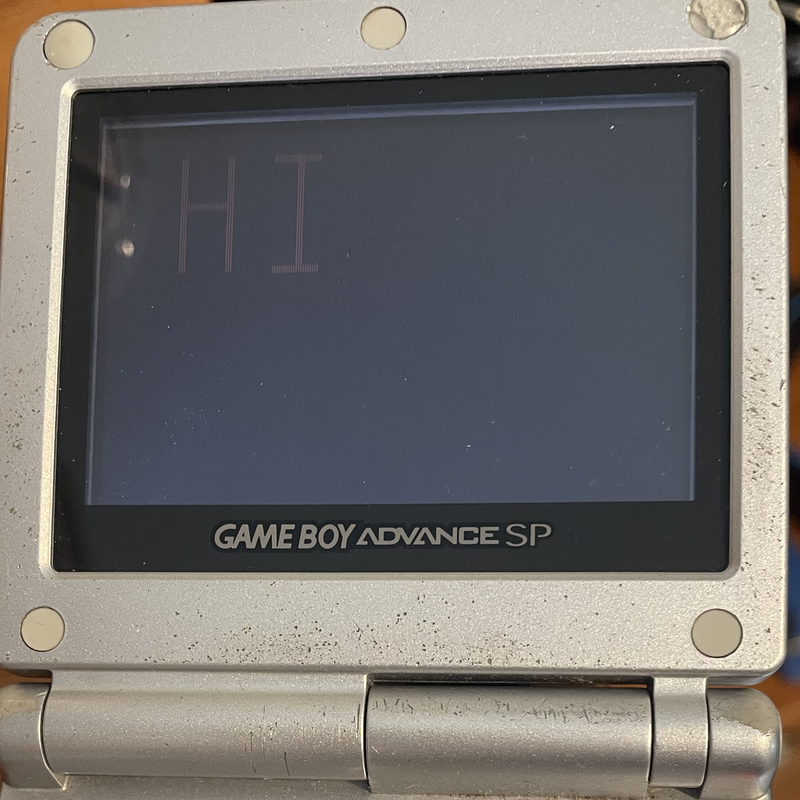
Perfection. So now i want to move on to getting some input from the user. This will need a bit more reading from registers etc, and then we will move to displaying a sprite, which will be using different display modes.
New Goal: I will respond to the user pressing a button